Graduate Film - StageFright!
- milometer
- Jun 20, 2022
- 4 min read
Updated: Nov 22, 2023
Stagefright is a short film created for my final year dissertation project, pitched in September 2021, worked on for 9 months with two other undergraduate students, Madeleine Boyce and Thomas Clark
Initially, this piece was pitched as a heavily stylised piece of animation, especially in the visual presentation of the lighting and effects, but when the team was assembled, with each person’s skillsets taken into account, we created a short based a little more in realism when it came to groom, lighting and clothsim became a focus for us, yet still keeping a high degree of stylisation in the shot layout and model style. My roles were as follows:

• Director
• Lead Storyboard Artist
• Animator
• Environment and prop design
• Character and Environment Modelling
• Editor, Sound supervisor
My Roles As Director
Firstly, the work I had prepared for the initial pitch was my first animatic developed for the film, which assisted in conveying some of the more abstract and difficult to explain

concepts of my work to lecturers and other students. Here, we can see the first concepts for the panicking sequence, in the form of eyes looking down at our character, and a second setting where the drumming equipment would go flying past him as he looks up at the crowd, but in practice, this was too much work for to be feasible for our deadlines after some delay in modelling and character design, around January in our work cycle.
As a result of this, this was replaced with a sequence using Crash’s model, altered to appear demonic and scary, and similarly to my original plan of using Crash’s eyes for this sequence to imply the self-inflicted pressure to perform for the crowd, the implied subtext of re-using the model fit very nicely.
The second was several other animated shorts we would use as reference for visual reference while developing the design elements of the project, especially in model, lighting and groom style. These shorts were as follows:
• Steamroller studios’ Master Trailer, as reference for lighting, clothsim and groom, as well as reference for character and environment modelling style.
• Fortiche Studio’s Freak of the Week, as reference for modelling style for the drums, and tone for the short, as a fast-paced pseudo-music video
• Kais Demon, a graduate film produced at BU, as a goal for our production quality, a reference for 2d effects we aimed to include in editing
• Whiplash, Pixar’s Soul and Fortiche’s Freak of the Week as references for cinematography and variation of pacing in musical animation. This heavily inspired my work in developing the storyboard and pre-visualisation of the piece.


These were all referenced heavily when individuals were unclear on creative and technical decisions moving forward in production from the start. An example of this would be the decisions made in the colour progression of the short, referenced to Freak of the Week and Kais Demon.
My Roles as Storyboard and Previs Artist
Later in the project, for visual clarity, this animatic was developed further twice, firstly, adding to the original 2d animatic, refining the opening sequence with visual ideas that were developed within scheduled meetings with our group, with a major focus on narrative clarity and creative use of composition. The result of this was a refined concept of the beginning of the drum solo, and a secondary scene backstage, which added some context to the entire short, which was cut, as we thought it gave away too much of the story much too early on.
My Roles as Character and Environment Modeller

While the team developed the character design of Crash, our protagonist, I worked closely with the designer so I could make sure I had a good understanding of the ideas and themes represented in Crash’s character to be fully explored within the model. In this series of illustrations, I further explored the ideas we had put forwards through some character work, which helped me get an idea of not only body and face shape but the personality to represent within the look of his model. I developed the character in Zbrush, performing retopology and UV unwrapping in Autodesk Maya, adhering to a format optimal for work by the rigging artist and texture artist in my team.
Final model, with placeholder Zbrush Materials

Retopology and UV unwrapping
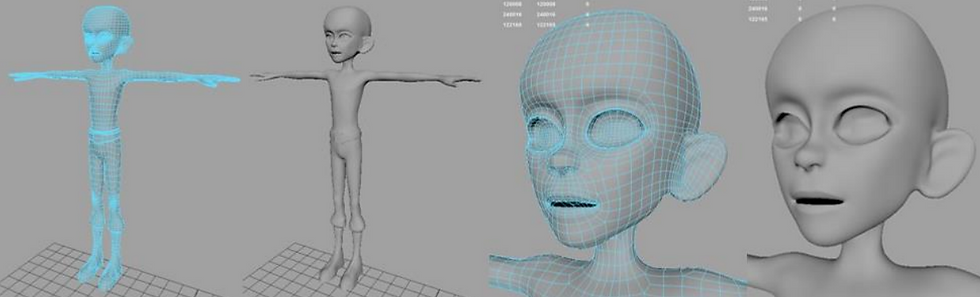
Then, the task of UV mapping the model. Initially, my product was made without much consideration of the texturing process, with unaligned, unorganised UV shells of varying sizes. This came from a want to optimise the UV layout space, intending to achieve the highest resolution possible on the skin textures. However, with some feedback from the texture artist, I was asked to rework the UV layout, as well as separate the skin mesh from the clothes, so we could separate the materials between the two. In this section, I also followed flippednormals video series on UV layouts, presented by modellers in the animation industry showing how they laid out their UV shells, for user clarity and seam management.

My roles as Environment Modeller
To create the model of the drums, I worked off of primary sources gathered at a music store, massing a collection of photos of drumkits that had an especially industrial aesthetic that I think fitted with the grungier side of our themes. Drumkits make use of many different intricate pieces, all unique, and can appear especially complex when considering many nuts, bolts and screws have to be positioned as to be changed in height or angle for a drummer’s convenience, but all must be kept within the same design. To tackle this effect, I made a series of parts that could be applied to many different sections of the drum, with tweaks made through scaling, angling, and extruding, while all using the same basic design. This also meant many drum parts could be grouped as overlapping UV maps, then a consistent UV map could be applied due to this arrangement.


My Roles as an Animator
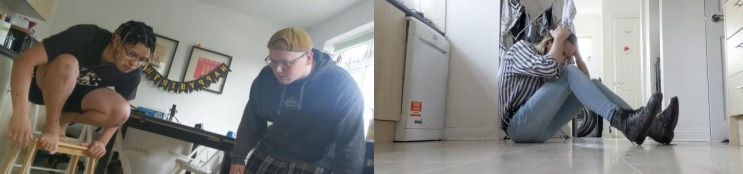
When splitting the shots animated between me and the other animator in my team, we separated the short into separate sequences we would animate in the same scene, then separate into shots using the Camera Sequencer in Maya, to save on individually prepping the groom and clothsim for each shot separately, to save on time, allowing more space for rendering. With a tight deadline approaching, I made use of techniques growing on primary shot reference, building the basic spine structure of movements on an animation layer, then the detailed movement and breathing on other layers.

Animation Breakdown


Comments